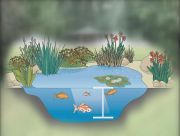
How to Build a Pond
Designing and constructing your own garden pond can seem a little daunting, particularly if you're not sure where to start.!
Water Garden have provided a comprehensive step-by-step guide to building an informal pond below.
Choosing the Location.

Ideally, the pond should be positioned in an area which is in partial shade. Ponds which are subject to full sunlight will generally attract more algae growth and may lead to an unpleasant green hue to the water.
Try and pick a location which is away from deciduous trees, as autumn leaves will settle on the water surface and sink, creating unwanted debris on the pond floor. Pond debris can be removed from the water surface using a Pond Skimmer or the pond can be covered over using a Pond Cover Net during the Autumn season, if the location is very susceptible to leaf debris.
Plan the pond depth.
If the proposed pond is purely for decoration (i.e. no fish), you should consider a minimum water depth of 0.6 metres.
If smaller decorative fish are being added, the depth should be around 0.6m - 1m.
If Koi Carp or large fish are being stocked, then the depth should be at least 1m -1.5m.
During the winter, the deeper water will remain a few degrees warmer than the surface, offering a more comfortable area for the fish to semi-hibernate.
Creating a water tight barrier.

There are a number of materials which can be used to create a water-tight barrier in the excavated hole. Although ready-made plastic and fibreglass liners can be obtained, these are often too shallow and limit the design and shape of your proposed pond.
Water Garden Ltd generally recommend using a flexible rubber liner, as this offers far more control over the pond size and shape. Pond Liners are also very economical and can last a lifetime if installed correctly. We also recommend using a Protective Underlay beneath the liner, to safeguard against root penetration and potential puncturing from stones or flints.
Plan the pond shape.
If using a flexible rubber liner, there are no real restrictions to the shape or size of the pond.
Informal ponds tend to feature more curved, natural forms whereas a formal pond is generally sharp lines and often square or rectangular in shape.
Water Garden can produce bespoke Box-Welded liners for more formal ponds if desired, which are made to the exact internal dimensions of your pond.
Check the ground level.
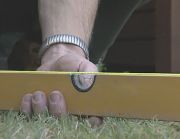
Ideally, the proposed area should be level but this is not always practical.
If the ground area is sloping, it will be necessary to build up the lower areas level to the highest point, so that the water level is maintained.
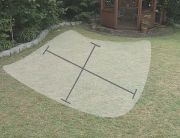
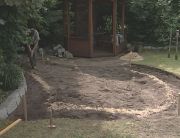
Marking out and Digging the outer pond area.
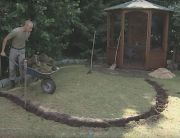
Mark out the basic pond shape on the ground using sand, string or a spray marker. Once you are happy with the outer shape, you can begin digging the perimeter with a spade, digging inwards from the outside edge.
The inner section of the soil can then be removed.
If you plan to add a marginal shelf for planting, dig the surface soil to a depth of around 30cm.
Marking out and digging the deep water zone.
The inner deep water zone can now be marked out and the soil excavated to the full pond depth. Ensure the sides of the pond are sloping inwards to prevent the soil collapsing.
Allow a 30-50cm perimeter 'shelf' for the marginal zone, which should be sufficient for planting baskets to be mounted on once the liner is fitted.
If you would like to create a stream or waterfall, some of the excavated soil can be used to create a raised bank which can then be covered using a flexible liner.
Creating a top trench (Capillary Barrier).

It's a good idea to create a small perimeter trench around the top area of the pond, as this will prevent water from saturating the surrounding soil. For ponds with an irregular shape, this can be easily achieved by driving stakes into the pond perimeter, around 10cm inside of the pond edge. Flexible pond hose can then be attached to the top of the stakes, following the shape of the pond.
The Underlay and Flexible Liner can then be folded over this lip and around the trench behind. The gap can be back-filled with pebbles or a suitable material, creating a physical barrier between the soil edge and the start of the pond's 'wet' side.
Measuring and selecting a Pond Liner.

Using a length of string or a flexible tape measure, start at one end of the pond (around 50cm from the pond edge to allow for pleating and folding where required) and follow the contours of the pond with the string or tape. Finish at the far side of the pond (again, around 0.5m onto the ground from the pond edge). Measure the total length of the string - this will determine the total length of the required liner. Repeat the process to determine the total width of the liner.
We generally recommend GreenSeal EPDM liner for most ponds as this is economical, offers excellent stretch characteristics and is simple to pleat and fold. We have a useful Pond Liner Calculator and also Pond Volume Calculators which may come in handy.
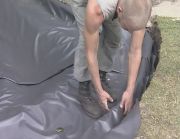
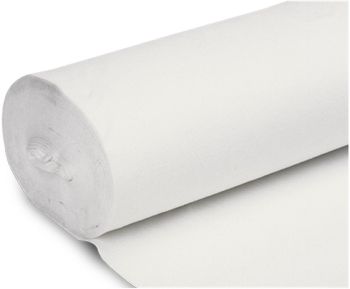
Fitting the Protective Underlay.

Protective Underlay is supplied in a 2 metre wide roll and is very easy to fit. Simply roll out the underlay and form around the pond contours. Allow at least 15-20cm overlap between sheets to ensure that a long lasting barrier against roots and stones is achieved. Any excess underlay around the pond perimeter can be cut with a sharp knife or scissors.
If the soil is particularly flinty, try to remove as many stones as possible before installing the liner. It is also a good idea to place a thin layer of sand on the base of the pond, but this is generally unnecessary when using a good quality pond underlay.
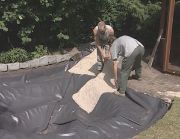
Fitting a Flexible Pond Liner.
Unroll the pond liner, being careful not to damage or tread on the liner itself. If the liner is large, it's worth borrowing a few friends to help lift it carefully into place. Once the liner is positioned over the top of the pond, flap the liner to allow air underneath and allow it to sink into the deepest section of the pond.
Step inside the pond (taking shoes off is a good idea!) and gradually push the liner into the pond contours. Pleat and fold the liner as neatly as possible. Do not cut any excess off until the pond is filled with water, as the weight of the water is likely to pull a little extra liner inwards.
Fitting a Decorative Stone Liner.
Decorative stone liners are an excellent way of disguising the rubber pond liner perimeter. Small stones are embedded onto a flexible substrate which can then be placed directly over the top of the black flexible liner, creating a decorative perimeter.
The Stone Liner can be cleaned easily using a Pond Vacuum Cleaner if required and is the preferred option over loose stones, as these create areas for debris and biomass to collect and can be difficult to clean. Stone Liner is also useful if pets have a habit of 'pond-dipping', as this offers some protection against sharp claws in the shallower zones.
Fitting a Liner on a Watercourse or Waterfall.

A gentle stream or waterfall is an excellent way of bringing the soothing sound of moving water to the pond. If you have chosen to create a banked area, this can be lined with protective underlay and another sheet of flexible rubber liner over the top. This liner can be joined to the main pond liner using a flexible underwater sealant such as Gold Label Pond Sealant.
Carefully ensure that there are no creases on the adjoining liner surfaces. Degrease both the watercourse and main pond liner and apply the adhesive in multiple rows to ensure a permanent bond. Press the two liners together gently and allow the sealant to cure before filling the pond completely.
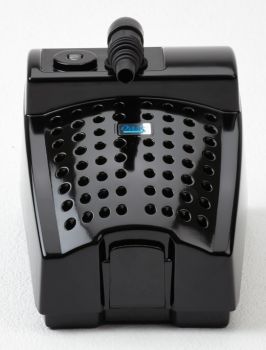
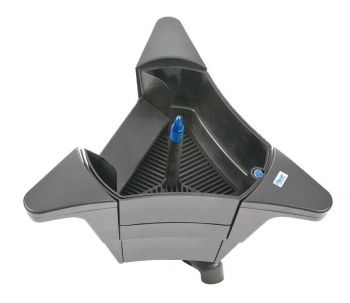
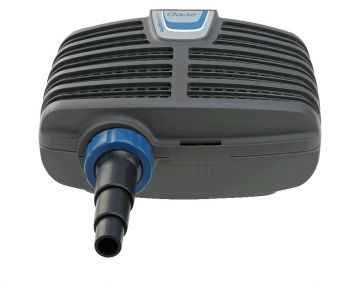
Choosing a Pond Pump & Filter.
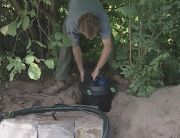
It is important to maintain a healthy environment for fish and other pond life, so a pump and filter system is highly recommended. The submersed pump will supply water to the filter box, which is usually mounted on dry land near the pond edge. The filter will clean the water and this is then returned back to the pond on a continuous basis. Many Filter Systems include an Ultraviolet Clarifier which will kill suspended algae ('green water') and clump this together. The algae lumps are then removed from the pond and broken down by the 'friendly' aerobic bacteria which live inside the filter box.
You can read more detailed information about which pump and filter is best for your pond. View our Pump Selection Guide and Filter Selection Guide for more details.
Planting.

Adding plants to a pond will not only increase its aesthetic appeal but will also help to reduce excess nutrients in the water. Water Lilies are an excellent choice as they also offer shade for pond dwellers. Water Lilies are suited to deeper water areas, generally in depths of 0.6 - 1.5 metres and can be planted in baskets to help keep the pond base free of soil and debris.
Shallower water areas such as marginal shelves can be planted with Flowering Rushes, Mare's Tail, Crowfoot and Branched Bur Weed to name but a few. The use of Hessian Marginal Shelf Planters is a neat way of supporting plants at the pond edge. Floating plants such as Water Hyacinth can also be used to great effect.
Pond & Garden Lighting.
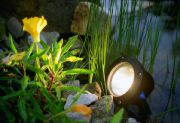
Adding strategically placed lights in the pond can create a whole new dimension, allowing you to enjoy the feature into the evening.
Pond Lights can be fully submersed and are ideal for illuminating streams, water features and fountains. Pond Lighting can also be used to highlight planting areas to great effect. Water Garden supply a wide range of Pond & Garden Lights in both Halogen and LED guises.
Pond Fountains.
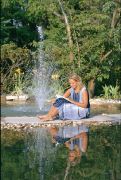
A pond fountain display can be used to add drama and water sound if desired. Fountains also help to aerate and circulate the pond water.
A fountain usually consists of a submersed pump, a rigid tube ('riser') and a fountain nozzle. Different nozzles can be used to create a completely different water display.
Multiple water jets can be created from one nozzle or more dramatic displays such as foaming jets and fan shaped cascades are possible. You can view our full range of Fountain Nozzles here.
We have pre-selected the most suitable fountain pumps for each specific nozzle, depending on the display height you would like to achieve in the pond.
Water Features.
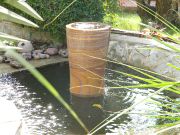
Water Features usually consist of a static object such as a stone column, tubes or sculpture which water is then pumped to. The water then cascades down the feature.
Water Features are usually decorative sculptures in their own right, so these still look attractive when the pump is switched off. The use of underwater lighting can further enhance the visual appeal.
Water Garden also offer a range of Dancing Water Features which are pre-programmed water and lighting displays and are ideal for garden ponds.
Products in this range

![Helpful info]() Find out more
Find out moreHelpful info
Making things easier
Use our helpful information section to assit you on buy and maintaning your products.

