How to Build a Water Rill
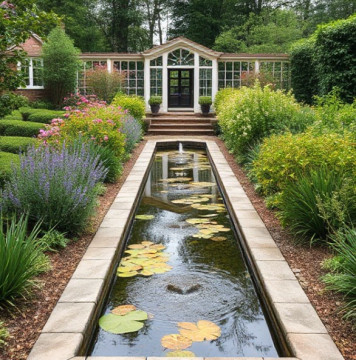
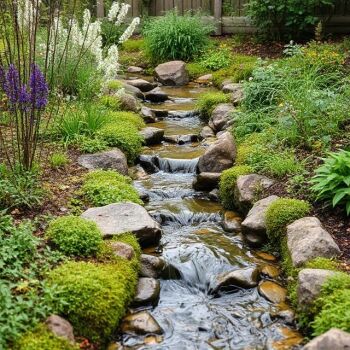
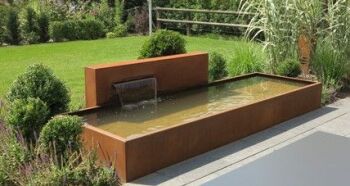
Water Rills are decorative, formal channels within which water will flow gently between the start (sump) point to the end (discharge) point and will recirculate continuously via the submersed pump in the sump or pond. Water Rills are a fantastic way of introducing shallow, moving water into virtually any outdoor environment and can be used to guide the eye toward other decorative elements within the landscape.
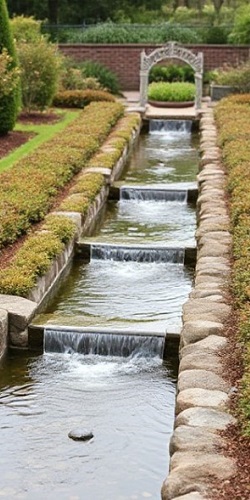
Water Rills do not need to be a simple, straight line channel. Rills can be elevated with individual cascades joining each segment and can also change direction with sharp 90° turns which add visual impact. The rill can terminate into an open pond or can disappear into the ether with the use of a hidden underground sump.
Rill Sizing.
There is no ‘rule’ as to the width of a formal rill but a good guide would to be to construct the internal channel width between 20cm - 60cm (8”-24”) and around 15cm - 40cm depth (6”-16”). The channel width is partly based on personal preference and partly based on the total length of the rill. For example, a relatively short rill length would benefit from a relatively narrow channel width to remain in proportion. A rill spanning a significant distance in a large garden may look more in keeping with a wider water channel.
The rill depth will generally depend on whether you intend to dress the internals of the rill construction with small pebbles, larger cobbles or leave this as the bare construction material. You will need a depth of water above any aggregate so large cobbles will require a deeper rill section to accommodate these and a shallow depth of water above, without coming too close to the top edge of the rill.
Rill Construction Materials.
Rills can be constructed from a wide range of materials. Below are some popular examples.
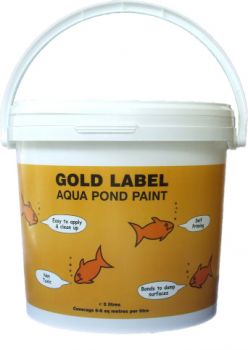
Brick. As the internals of the rill need to be sealed to ensure water remains inside the rill without leakages, bricks can be a challenge as there surfaces are often rough and porous. It is possible to seal the bricks internally with a transparent pond paint but it may be more prudent to ‘clad’ with thin brick slips if the internals need a brick visual effect.
Concrete. A rill can be cast by creating a wooden shuttered framework, in which concrete is poured and once set, the shuttering is removed to reveal the rill structure beneath. Whilst a concrete finish is popular with some, it will likely still require sealing internally with an epoxy pond paint to ensure a water tight seal.
Blockwork. Blocks are a popular choice of material for rill construction and offer the opportunity to render the internals and externals for a neat, contemporary finish. It’s worth mentioning that the internals of a rill should ideally be black or a dark colour as there is potential for algae to slowly build up in natural water features and this is far more visible when lighter colours are used. Darker renders or painted internals will require less maintenance as any slight algae growth will be almost invisible.
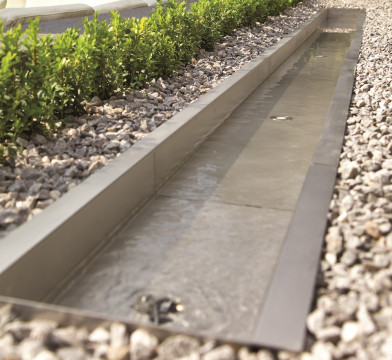
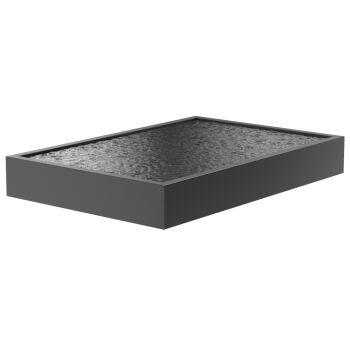
Stainless Steel. Sheet metal workers can create relatively narrow and shallow rill segments from Stainless Steel but, these are limited in their length due to standard available steel sheet sizes. These can be welded on site or, can be fabricated to join together with a gasket seal. Stainless Steel is very simple to maintain and will offer a modern aesthetic but, can be rather expensive to create as this is likely to be a bespoke construction and the raw sheet materials remain expensive.
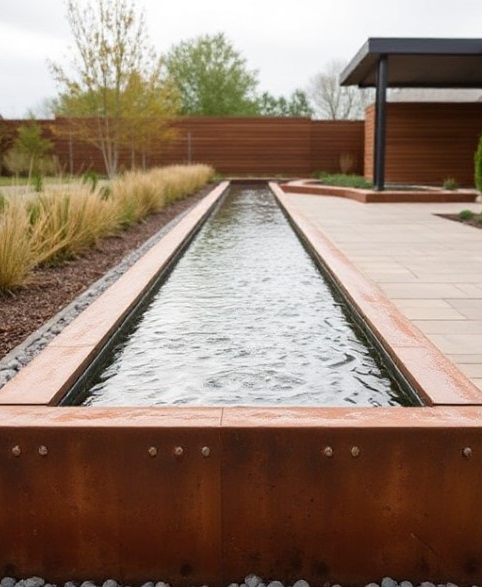
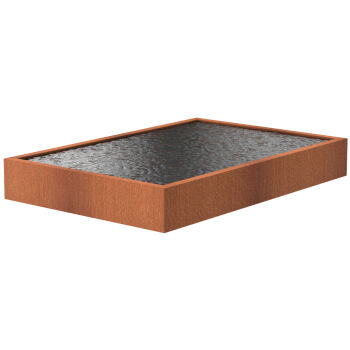
Corten Steel. This increasing popular material is being used for a wide variety of buildings, cladding and water features, offering an industrial aesthetic. Corten will naturally rust over time but once the surface layer has completed this rusting process, the layer of steel beneath is protected by the formed surface rust layer. Corten is far cheaper than Stainless Steel and can be worked and welded with relative ease. The internals of a Corten Steel rill will likely benefit from sealing as the ongoing oxidizing process may result in bright orange water rather than the desired clear water effect.
Safety.
A decorative formal rill is an excellent way of introducing water into a garden or landscape, with less safety concerns of open water vs a deeper pond, for example. Generally, the rill may only contain a few centimetres of actual water depth above any decorative stones or aggregate and the lower water chamber can be set below ground with a safety grid or lid over the top, which will reduce safety concerns of open water areas.
Spillways.
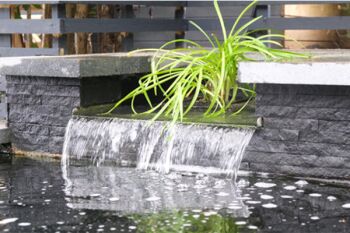
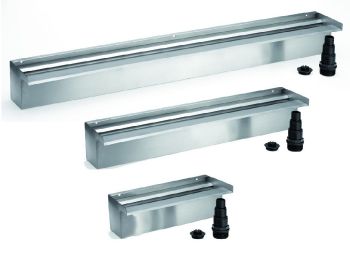
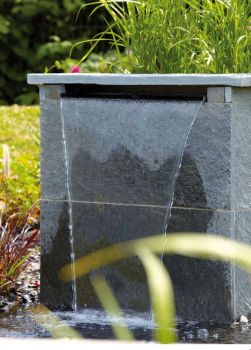
If you intend to have a series of rills cascading or feeding into one another, a Gravity Spillway can be used and built into the rill design. At the end of the rill, the water will flood up and over the spillway which overhangs into the next rill beneath and provides a cascading sheet of water. At the discharge point of the rill, a Pressurised Water Blade can be used will produce a cascading water sheet via the pumped water flow in the lower sump. The Water Blade is an excellent way of spreading the water across the full width of the cascade at the point of discharge.
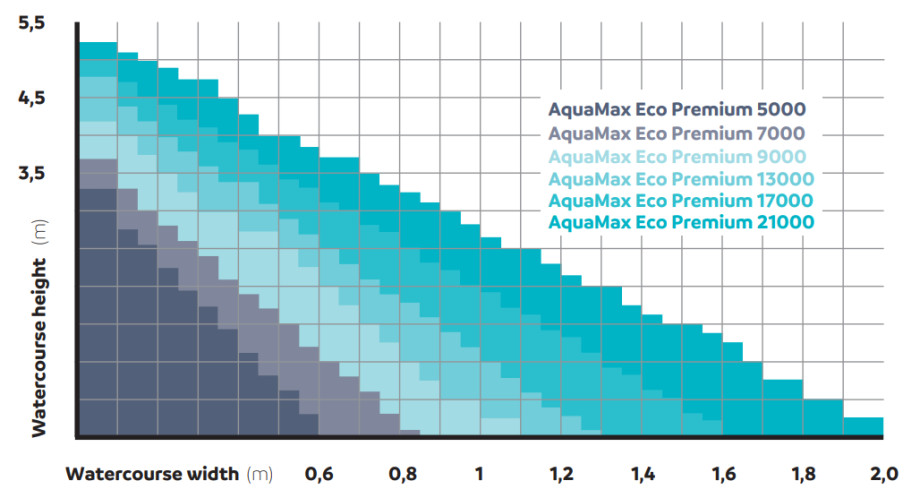
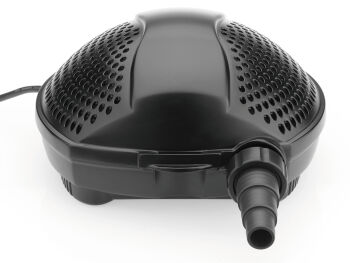
Pump Selection.
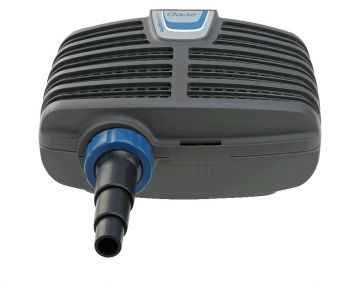
As a general guide, the rill pump should provide around 1000-2000 Litres/hour of water flow for every 10cm of rill width. So, if the rill channel is 30cm wide for example, select a pump with a flow rate of between 3000-6000 Litres/hour. Also allow extra flow and pressure to account for any vertical lift and potential loss of flow if the connecting hose is of a significant length. Water Garden Ltd can help you select the correct pump and hose sizes so please Contact Us for expert guidance.
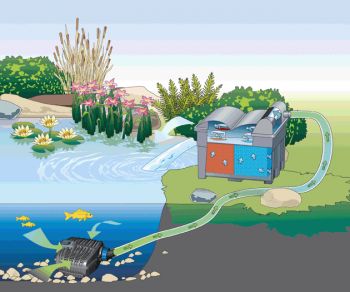
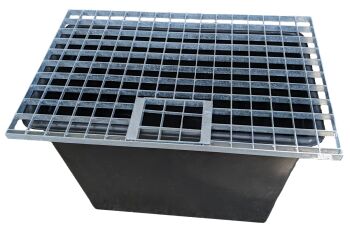
Water Sump Sizing.
An underground reservoir will need to be constructed to hold enough water to ensure the hose and rill channels can be filled and for the pump to remain fully submersed at all times. Due to the long and shallow nature of a rill, water evaporation will likely occur, so the reservoir should cater for some water loss without the need to top-up constantly.
If the rill is designed to hold a volume of water before overspilling into the reservoir, this can be filled via a mains water hose initially so that when the pump is switched on, only a small amount of sump water is required to cause the rill to spill over and recirculate. If the rill will drain itself dry when the pump is switched off, you will need to ensure there is sufficient water in the main reservoir to fill the rill AND to accept the draining water once switched off.
To calculate the approximate size of your water sump (and assuming the rill will empty itself when switched off), calculate the rill water volume and add 25-30% extra water in reserve. As an example, let’s assume the rill is 5m in length, 0.3m wide and 0.2m depth;
5 x 0.3 x 0.2 x 1000 = 300 litres. Add 25-30% extra capacity to ensure the pump remains submersed and with extra water volume in reserve. Let’s approximate at 400 Litres total volume required. This would equate to a sump measuring around L0.8m x W0.8m x D0.6m.
This size sump should therefore be sufficient to fill the dry rill when the pump is switched on and return the water back to the sump for recirculation. Once the pump is switched off, all water will drain from the rill into the lower sump.
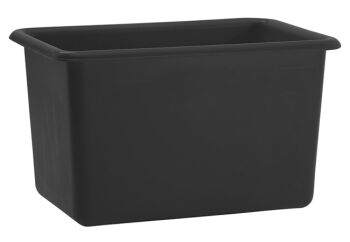
Reservoir Construction.
Essentially the sump ‘hole’ needs to be fully watertight and there are a number of ways to achieve this;
Block, Render & Paint. Pour a concrete pad and create blockwork internal walls. Render the internals (a waterproofing additive can also be sued in the render mix). Use a 2 part epoxy pond paint and coat the internals with 2-3 coats. This should provide a waterproof seal, ready to accept the submersible pump and water.
Excavate and rubber lining. An excavation into the soil can be made and this can be lined firstly with heavy duty protective pond fleece and overlined with a single sheet EPDM Rubber Pond Liner to create the waterproof seal.
Fibreglass. This would be similar to the block and render approach but with the use of fibreglass sheet products. Fibreglass is extremely hard wearing but will likely require a specialist professional to complete this on-site.
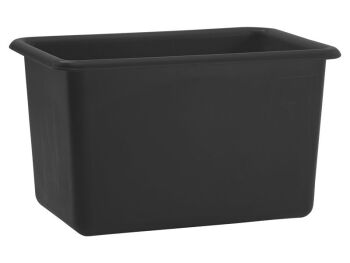
Pre-formed reservoir. Perhaps the easiest installation option, a pre-constructed sump can simply be dropped in to the excavated hole, levelled up and back-filled with sand or gravel for rigidity and stability.
If you do not wish to have open water in the reservoir for safety or aesthetic reasons, the reservoir can be covered with a steel grid or fibreglass lid and can then be dressed over with decorative pebbles to disguise. It is worth locating a support grid before finalising the reservoir size as the sump can then be made around the standard grid size. When selecting a grid or lid, ensure that this is capable of holding the weight of a human for safety reasons, should this be stood on by accident.

If you need further advice on the construction of a formal rill or need help calculating and selecting the correct products, call the team at Water Garden Ltd for friendly, expert guidance.
Products in this range


![Helpful info]() Find out more
Find out moreHelpful info
Making things easier
Use our helpful information section to assit you on buy and maintaning your products.

