Lighting can be used in a multitude of ways to create enticing atmospheres and effects in your garden or pond. Lights can vary with a range of beam angles, colours and brightness and each lamp has an intended purpose. Choosing the right lamp for the right job is critical as a standard lamp won’t last long underwater nor will a spotlight do a great job at illuminating large areas. Throughout this article we will be discussing the different types of lamp available, their intended purpose and effective uses to help you make the best use of the lighting available.
Spotlights
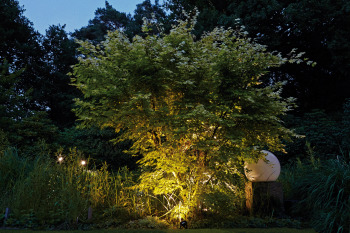
Spotlights are used to highlight key features such as ornaments, bushes and planting. They help to draw the eye to the illuminated subject without lighting a large area. Spotlights generally feature a beam angle of between 5° - 15°, allowing the light beam to be more focused and cover greater distances without a large spread of light.
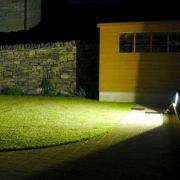
Floodlights
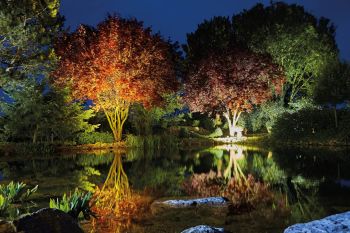
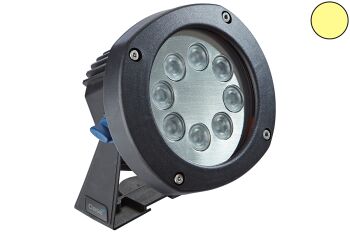
Floodlights are used to illuminate large areas such as fields, ponds, and large expanses. They help to illuminate wide areas to create safety at night or to make outside areas useable in darkness. Floodlights generally feature a beam angle of greater than 20°, allowing the light to spread wider over a shorter distance but also means the light won’t reach quite as far as a spotlight.
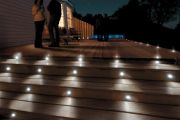 Recessed Lighting
Recessed lights are generally used in decking or patios to highlight perimeters and to give an area gentle illumination. Deck lights generally do not have a specific beam angle but feature a flush lens and flanged lip. Deck lights will generally have clips on the side to assist securing them into recesses inside bricks, blocks, decking and sleepers.
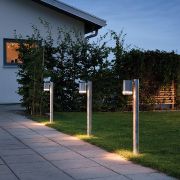
Post Lights
Post Lights are lights which are mounted or incorporated into a pillar. They generally offer low level light to gently illuminate walkways, passages and planting borders. Post lights generally illuminate downwards in a 360° span and are quite commonly solar powered.

String/Net Lights
String and Net Lights consist of multiple low power LED’s spaced out equally along linear wires. The wires are then intertwined to create either long strings or nets of lighting. They are effectively used on posts and bushes.
Using Lights Effectively
To get the most out your lighting you need to plan ahead. Drawing a simple sketch showing the key items you wish to illuminate will help with deciding what to put in and where to place them. Look at each lamps’ technical capabilities such as Lumen output, beam angle and potential lighting distance. Oase Pond Lights are provided with lighting cone diagrams which help you understand what brightness of light and spread can be expected at a certain distance.
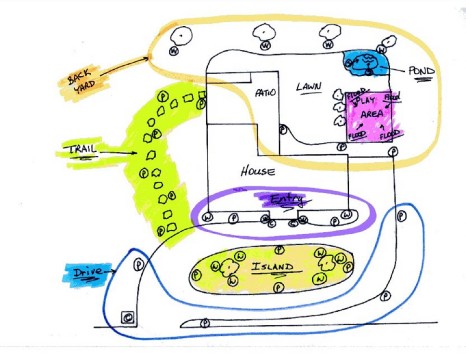
The simple lighting plan example above shows that it doesn’t require a specialist to plan your lighting out. Something just as simple as above will help you think about what you are wanting to illuminate. Once the plan is complete you are able to walk through the area and visualise the exact placement for each light and start to think about cabling. Cabling should be disguised as best as possible but if its being buried, don’t forget to adequately protect it. Generally people opt for a safe, low voltage plug and play installation which features cables in a variety of lengths which are pre-fitted with weatherproof low voltage connections. These cables can be extended as long as needed by simply connecting one cable to the next.
Selecting Your Lights
Once everything has been fully thought through it is now time to start to looking at the lights. When looking for lights try not to opt for the cheapest units available, be prepared to spend that little bit extra to get a high-quality item. The market is currently filled with a mixture of inexpensive, poor quality lights from China and expensive, high-quality units produced in Europe and the USA. Choosing lights of a high quality is important as the life span of the unit is critical, nobody wants to have to replace their garden lights once every six months.
If an assortment of different lights is being used, try and match the colour tone of the light i.e. warm white, cold white. This can also be done more accurately by matching lights by their colour temperature (Kelvin) for example 2700 Kelvin is roughly equivalent to traditional halogen warm white lighting whereas 4000 Kelvin will offer a more contemporary cold white effect.
Correct Cabling
Once the lights have been chosen you will then need to consider cabling to provide power to the light units. There are a variety of ways to run the cabling and the best method will largely depend on the layout of your lights. The two methods generally used are either daisy chain or the hub method. Daisy chain consists of a single cable with multiple connections equally spaced along the wire. This method generally suits installations where lights are equally spaced and follow a particular line, this method is not suited where lights are great distances apart or positioned randomly. Hub consists of a centralised transformer with multiple splitters to branch out like tree roots to each of the lights. This method can be made to suit almost any installation but due to the extra cables and connectors involved this method can cost significantly more.
Powering Your Setup
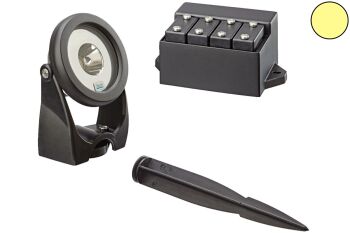
Once all of the lights have been selected and cabling method decided upon we need a means of powering the setup. A transformer will be required to operate your low voltage garden lights, but it’s not quite as simple as picking up any transformer. All of the lights need to be checked for the voltage requirement and amount of wattage which they consume. This information should be clearly labelled on the packaging or instruction booklet. Each of the wattage amounts need to be added together and totalled; for example if you had 5 lamps each at 10 watts you would need to use a transformer which can support 50 watts or greater. Using a transformer with a greater wattage capacity doesn’t present a risk and it is actually recommended to allow for future expansion on the setup. By using a larger transformer, it will allow you to install more lights at a later date without the need to exchange the transformer for a larger one. Transformers are available as indoor (IP20 minimum), weatherproof (IP54 minimum) and waterproof (IP68 exclusively). IP rating stands for Ingress Protection, this is critical when selecting a transformer, as it will dictate where it can be housed. A waterproof transformer is recommended when being used outdoors as it offers the greatest protection against the elements and can even be used submersed.
Installation Advice
During initial installation it is best to not bury the cables but to leave everything accessible. Wait until the evening and switch the lighting on as this will give you a chance to see how effective your lighting placement is and will highlight any changes which need to be made. The following day you can reposition the lights to give the best effect and once you are happy with the positioning you can bury or disguise the low voltage cables. In areas where digging is required or sharp tools may be used, a solid conduit or trunking is recommended to protect the cables. In cases where 240v lighting is used it is required to contact an electrician. Low voltage 12v lighting allows the end consumer to complete installation themselves from start to finish without the need for excavation and trenching.
If you need any help or advice when planning out or installing your garden lighting, Water Garden Ltd are more than happy to offer advice and assist you with selecting the correct products for your lighting project.

